I was lucky enough to find a lovely illustrated children's book from the 1920s at Evandale Market a few months ago. It wasn't in brilliant condition but I scanned a few of the pictures, cleaned up the marks using Elements, and brightened the colours, and was amazed at how well the pictures emerged.
(I believe the coypright should have expired by now). I resized this image and printed it onto a textured singlefold ivory card. You can't really see the texture in the picture but it really adds to the overall effect. I added a little version to the back and as strip of Japanese paper inside. Best of all there are lots more pictures left to play with!!
Playing with paper - a technique a week for those who enjoy the journey as well as the destination!
Saturday, 6 October 2012
PRINTED VINTAGE CARD
Labels:
Digital techniques
Location:
Riverside TAS 7250, Australia
Saturday, 29 September 2012
FAUX TILES
There are lots of ways to achieve faux tile effects. this is one of them. I stamped a daffodil stamp (from Rubbadubbadoo) onto white card, cut it into four. I then stuck onto a backing square of white card in with a little gap between each tile, using fairly thin foam tape. Finally I dabbed Versamark over the tiles (being careful not to drag it and risk smudging the ink below), and added a couple of coats of clear UTEE. I was quite pleased with the result but when I do it next time I will use thicker card. There was a lot of fiddling with heat to the front and back of the panel to make it lie straight. (This might also have been because the card was a bit damp to start with).
Location:
Riverside TAS 7250, Australia
Saturday, 22 September 2012
BUBBLEWRAP PRINTING
Labels:
Background techniques,
Paint,
Prints,
Stamping
Location:
Riverside, Tasmania
Saturday, 15 September 2012
WHITE GESSO ON BLACK CARD
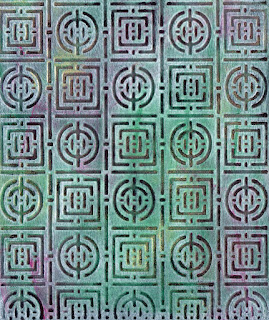 I'd never really used gesso until the last few months but now I'm a real convert, as there seems to be so many ways in which it can be used. If you want a similar effect to the one in the photo, cover black card with a thin layer of white gesso. When it's dry sponge on two or three different inks (I've used red, green and gold, and to be honest, just applied it straight from the pads) I've then just run it through my Cuttlebug, using a folder from Craft Concepts.
Labels:
Background techniques,
Embossing,
Gesso,
Paint
Location:
Riverside TAS 7250, Australia
Saturday, 8 September 2012
RANDOM PAPER STRIPS
This is an easy but effective background. Stack up three or four different patterned papers and secure with a couple of paperclips, then cut into randomly angled strips. Carefully unstack the papers and, using one from each pile in turn, reassemble the strips on a pieces of backing card, leaving a little gap between each. If you are just using up paper scraps these panels are great for backgrounds. If, on the other hand, like me, paper is your favourite supply, you might want to use the technique to show off your collection, and the panel can stand alone and complete "as is".
Labels:
Background techniques
Location:
Riverside TAS 7250, Australia
Saturday, 1 September 2012
STAMPED PAPER CLAY
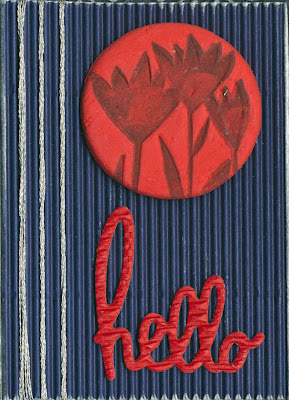 Paperclay is a good medium for adding large components to cards as its very light so even little cards like this won't overbalance. It air dries as well. I've made this gift card from corrugated. The edges are inked with silver and a couple of strands of silver thread are wrapped around as a border. The greeting is a cuttlebug die. The button is paper clay, rolled flat and cut out with a biscuit cutter, then stamped with black ink, using a stamp from Abi's Crafts.
Location:
Riverside TAS 7250, Australia
Saturday, 25 August 2012
FLOWERSOFT WATTLE
Saturday, 18 August 2012
VERY EASY PAINTED BACKGROUND
Two postings in one day! I was asked to put this background up after the recent demo I did. So here it is!!
Its a super easy one - I wanted some background paper on which to mount my pictures of the Pilbara, and so just blobbed some silver, gold and copper straight onto light card (directly from the tube of acrylic paint), and spread it with a brush so that areas blended and the whole page was covered.
For something that took two minutes it turned out exactly as I had hoped, and I'll be making some more.
I scanned it and used it to make up a title too. (Just open another layer over the top of the scanned painted paper, type in your title, select it using the magic wand tool, then cut out the selection to reveal the painted "filling" underneath before collapsing the layers.
LEAF RUBBINGS
 |
| Original Leaf Rubbings |
 |
| "Stamp" |
 |
| Color Burn, Diffuse Glow |
Labels:
Crayons,
Digital techniques,
Rubbing
Location:
Riverside TAS 7250, Australia
Saturday, 11 August 2012
OVERSTAMPING
I'm doing a demo for work that involves ATC styled cards and made this one for that reason. Its about as simple as you can get in this regard. All the stamps came from a Stamp-It uncut sheet, and the technique was just to stamp them, each on top of the other, using a different colour of ink for each. I did have to experiment a bit to get the colours in an order that I liked but all in all its a very quick technique that looks a lot better than I had anticipated i.e. I plan to do this more often. The word "Free" was made with Kaiser alphabet stickers - I didn't have any that looked quite right so I just smeared some black ink over some cream ones. As mentioned, I was doing this for a reason, and I think if I was just making something for myself I'd probably substitute a stamped word for the stickers
Labels:
Background techniques,
Stamping,
Stickers
Location:
Riverside TAS 7250, Australia
Saturday, 4 August 2012
PAINT AND PRINT BACKGROUND
 |
| Hessian Print |
 |
| Onion Bag Print |
I've been printing with paint......nothing too difficult, basically just painting on some Kaiser acrylic paint straight from the tube and then pressing the object onto some light card. The green sample is hessian, the red print was made with an onion bag. Both were a bit hard to press down on "as is" so I covered the painted item with a piece of scrap card and lightly brayered over the top to apply the pressure to print. The rose stamp is from Rubbadubbadoo and was stamped with Staz On onto acetate. The image was then coloured in with a red Sharpie pen.
Labels:
Background techniques,
Paint,
Prints,
Stamping
Location:
Riverside TAS 7250, Australia
Saturday, 28 July 2012
COVERED NOTEBOOK
Its a bit of a cheat to call this a technique, but I was pleased with the results of covering this discount store notebook with some lovely patterned paper, and so thought I'd share. The blue is Bazzill, and the black strip is ribbon, which also doubles as a bookmark. A few black adhesive pearls were used to finish.
Saturday, 21 July 2012
BARGELLO BACKGROUND
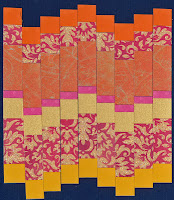
Even although I've labelled this as a background, I think it could stand alone as a card topper. Its the paper version of a well-known quilting technique and I've seen it in all sorts of other places so I make no claim to originality here. I do, however, think its a great way to use up scraps of paper. having said that I think I'll spend a bit longer chosing colours when I use it for a "real" project rather than just as a try-out technique for this blog, as I'm not totally convinced that these ones go particularly well together.
;
;
Labels:
Background techniques
Location:
Riverside TAS 7250, Australia
Saturday, 14 July 2012
LEAF PRINT
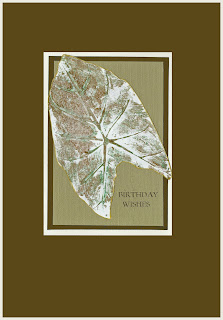 A very long time ago when I lived in PNG I made a little wall-hanging quilt from leaf prints from the garden. I used fabric paint on calico, and did a few trial runs on paper first. I found this one when I was sorting through some stuff in the craft room. I think it might be a taro leaf, but so much time has passed I'm not sure. I do know that lacking any equipment to speak of at the time, I just painted onto the leaf and pressed it with my hand onto the paper/calico. I have scanned it for this example and turned it into a "pretend card" i.e. made on the computer. I had rather forgotten about this very simple technique but think its time to rediscover it. It would be a good way to embellish garden-themed scrapbook pages.
Saturday, 7 July 2012
CUT UP YOUR STAMPS
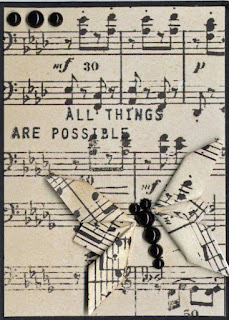 I needed some words to go on this little panel but couldn't find quite the right thing. I saw a Kaiser (and no I don't work for them.....its just that they make some good stuff at a reasonable price so its a bit over-represented in my craft room) stamp that was almost right. It had a religious text that was inappropriate for how I wanted to use this card, and in any case, it wouldn't have fitted in the small space with extra words. A few snips with the scissors later and I had just what I needed. Acrylic stamps (I have just found out) cut really easily, and if you need them as they were they can be somewhat reassembled on a clear block. I'm now revisiting some of the unused text stamps from other sets I own to see how they can be made useful. After all....."All things are possible".
Location:
Riverside TAS 7250, Australia
Subscribe to:
Posts (Atom)


