Playing with paper - a technique a week for those who enjoy the journey as well as the destination!
Saturday 29 September 2012
FAUX TILES
There are lots of ways to achieve faux tile effects. this is one of them. I stamped a daffodil stamp (from Rubbadubbadoo) onto white card, cut it into four. I then stuck onto a backing square of white card in with a little gap between each tile, using fairly thin foam tape. Finally I dabbed Versamark over the tiles (being careful not to drag it and risk smudging the ink below), and added a couple of coats of clear UTEE. I was quite pleased with the result but when I do it next time I will use thicker card. There was a lot of fiddling with heat to the front and back of the panel to make it lie straight. (This might also have been because the card was a bit damp to start with).
Location:
Riverside TAS 7250, Australia
Saturday 22 September 2012
BUBBLEWRAP PRINTING
Labels:
Background techniques,
Paint,
Prints,
Stamping
Location:
Riverside, Tasmania
Saturday 15 September 2012
WHITE GESSO ON BLACK CARD
 I'd never really used gesso until the last few months but now I'm a real convert, as there seems to be so many ways in which it can be used. If you want a similar effect to the one in the photo, cover black card with a thin layer of white gesso. When it's dry sponge on two or three different inks (I've used red, green and gold, and to be honest, just applied it straight from the pads) I've then just run it through my Cuttlebug, using a folder from Craft Concepts.
Labels:
Background techniques,
Embossing,
Gesso,
Paint
Location:
Riverside TAS 7250, Australia
Saturday 8 September 2012
RANDOM PAPER STRIPS
This is an easy but effective background. Stack up three or four different patterned papers and secure with a couple of paperclips, then cut into randomly angled strips. Carefully unstack the papers and, using one from each pile in turn, reassemble the strips on a pieces of backing card, leaving a little gap between each. If you are just using up paper scraps these panels are great for backgrounds. If, on the other hand, like me, paper is your favourite supply, you might want to use the technique to show off your collection, and the panel can stand alone and complete "as is".
Labels:
Background techniques
Location:
Riverside TAS 7250, Australia
Saturday 1 September 2012
STAMPED PAPER CLAY
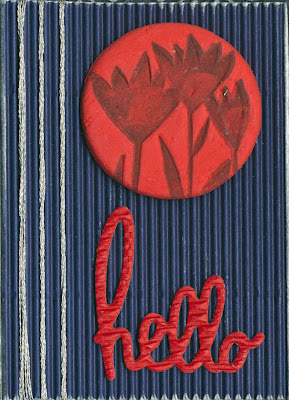
 Paperclay is a good medium for adding large components to cards as its very light so even little cards like this won't overbalance. It air dries as well. I've made this gift card from corrugated. The edges are inked with silver and a couple of strands of silver thread are wrapped around as a border. The greeting is a cuttlebug die. The button is paper clay, rolled flat and cut out with a biscuit cutter, then stamped with black ink, using a stamp from Abi's Crafts.
Location:
Riverside TAS 7250, Australia
Subscribe to:
Posts (Atom)


