Saturday 30 March 2013

OBSCURING TEXT FROM BOOK PAGES

PAGES WITH PAINT
PAGES WITH GESSO
WOVEN GESSO STRIPS
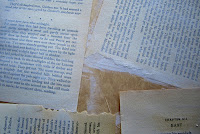
I've been playing around with old book pages over the last few weeks.  The hardest bit was biting the bullet and actually tearing up a book!!!   In the end this one was a very old paperback which had pages missing and which was falling apart.  Plus I already had another copy!  Even so........Having finally cleared the first hurdle the rest has been comparatively easy.

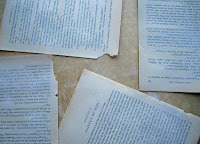
One of the issues faced when using book pages for craft projects is that sometimes the actual words on the page are inappropriate.  I gave some of the pages a light coating of acrylic paint  - a second light coat would have obscured the words sufficiently whilst still retaining the look of text.  For the second sample I used gesso, with similar results.  The main difference was that the latter was "toothier" and would probably make a better base for stamping etc.

If you're still worrying about the text being too readable, you could always cut your paper into strips and weave it together as shown in the third picture!

Saturday 23 March 2013

EYESHADOW/CHALK STAMP AND BACKGROUND

EYESHADOW IMAGE WITH BACKGROUND
I'm still playing with my eyeshadow set (a couple of dollars is going a really long way).  Back in January I posted a picture of a peacock stamp which I'd dusted with a variety of colours.  Subsequently I've used them to colour a background for stamping.
Add caption
I wondered if applying them more liberally to  a watermark ink stamped image (this one is Graphic 45 from Hampton Art) would kill two birds with one stone by making both image and background, or whether it would just end up as a murky mess.  Well....here are the results...OK I think.  I used blue and magenta.  (And every time I use colours such as these I smile as I imagine the reaction if I actually used the eyeshadows as intended... a whole new look for work on Monday??)

Saturday 16 March 2013

SCALLOPED CIRCLE SPIRELLI

SCALLOPED CIRCLE SPIRELLI
Looking for something else to do with your scalloped circle hole punches or die cuts?  How about wrapping them in some thread.  I've used a fairly thick variegated embroidery thread (unfortunately you can't really see the colours very well in the photo), and just taped it to the back to begin.  If you want a large hole in the middle don't skip over too many scallops when you are winding.  For a small hole, do the reverse.  Just keep going sequentially until there are two threads from each gap, and then tape the end to the back to finish.

Saturday 9 March 2013

EASY LAYERED FLOWER

Here's another easy flower to make using layered punched or die cut flowers.  Most shapes will work, just duplicate the base layer and then cut a section from the next shape. Remove  a slightly larger piece from each subsequent layer.  Overlap the edges and secure with double sided tape or glue.  Pierce a small hole in the base of each shape and layer from flattest to most curled and secure with a split pin.

Saturday 2 March 2013

THREE LAYER PAPER CARD

 I bought this pretty pink card a few years ago at Tokyo airport. I just loved the way it was constructed, and so decided to make my own.  The middle (burgundy) layer is longest, and is pleated at one end.  This means that the card can be closed by tucking the other side into a fold.  Its a little hard to see from the photo, but I have used a light mulberry paper with a lot of plant fibre for the orange cover, a burgundy embossed paper for the middle, and a  gold shimmer for the interior.  This card is a real treat for paper lovers, and really need no extra decoration.