Saturday 31 May 2014

BACKGROUNDS IN ELEMENTS WITH DOODLED BRUSHED

If you have Photoshop Elements then its easy to make your own backgrounds. I've used my score board to divide a white A4 paper into 2.5cm squares, and each I've doodled a vaguely flowery or leafy shape with a black marker.  Some turned out well, others not so.........at this stage it doesn't really matter.

Use the selection tool to select one that you like then click on "Edit" then "Save as Brush."  Name it if you want to.  After this its a matter of opening a new file in whatever size you want, make the background whatever colour you want, then click on the brush tool.  Go up to the little picture at the top which shows the brush you've chosen and click on the arrow.  Scroll down and select the brush you have just made.  Chose a size and colour and off you go.  Here are some examples from my sheet...........
 

Saturday 24 May 2014

PENCILS OVER WHITE INK

PENCILS WITH WHITE INK
 This is an easy way to look like an artist.  Stamp on black paper with white ink (I've used a Versacube and a Darkroom Door stamp).  Colour over the top with pencils (I had some cheap kiddie ones on hand and only a selection of 6 colours, so imagine what you could do with "real" ones!).

Saturday 17 May 2014

POWDER STAMPING - ONE THAT DIDN'T WORK!

POWDER BUTTERFLY
I have a good habit of noting down ideas as I come across them and a bad habit of forgetting to write down the source.  In any case, this time, although I would usually make an acknowledgement, it probably doesn't matter, as this didn't work for me.

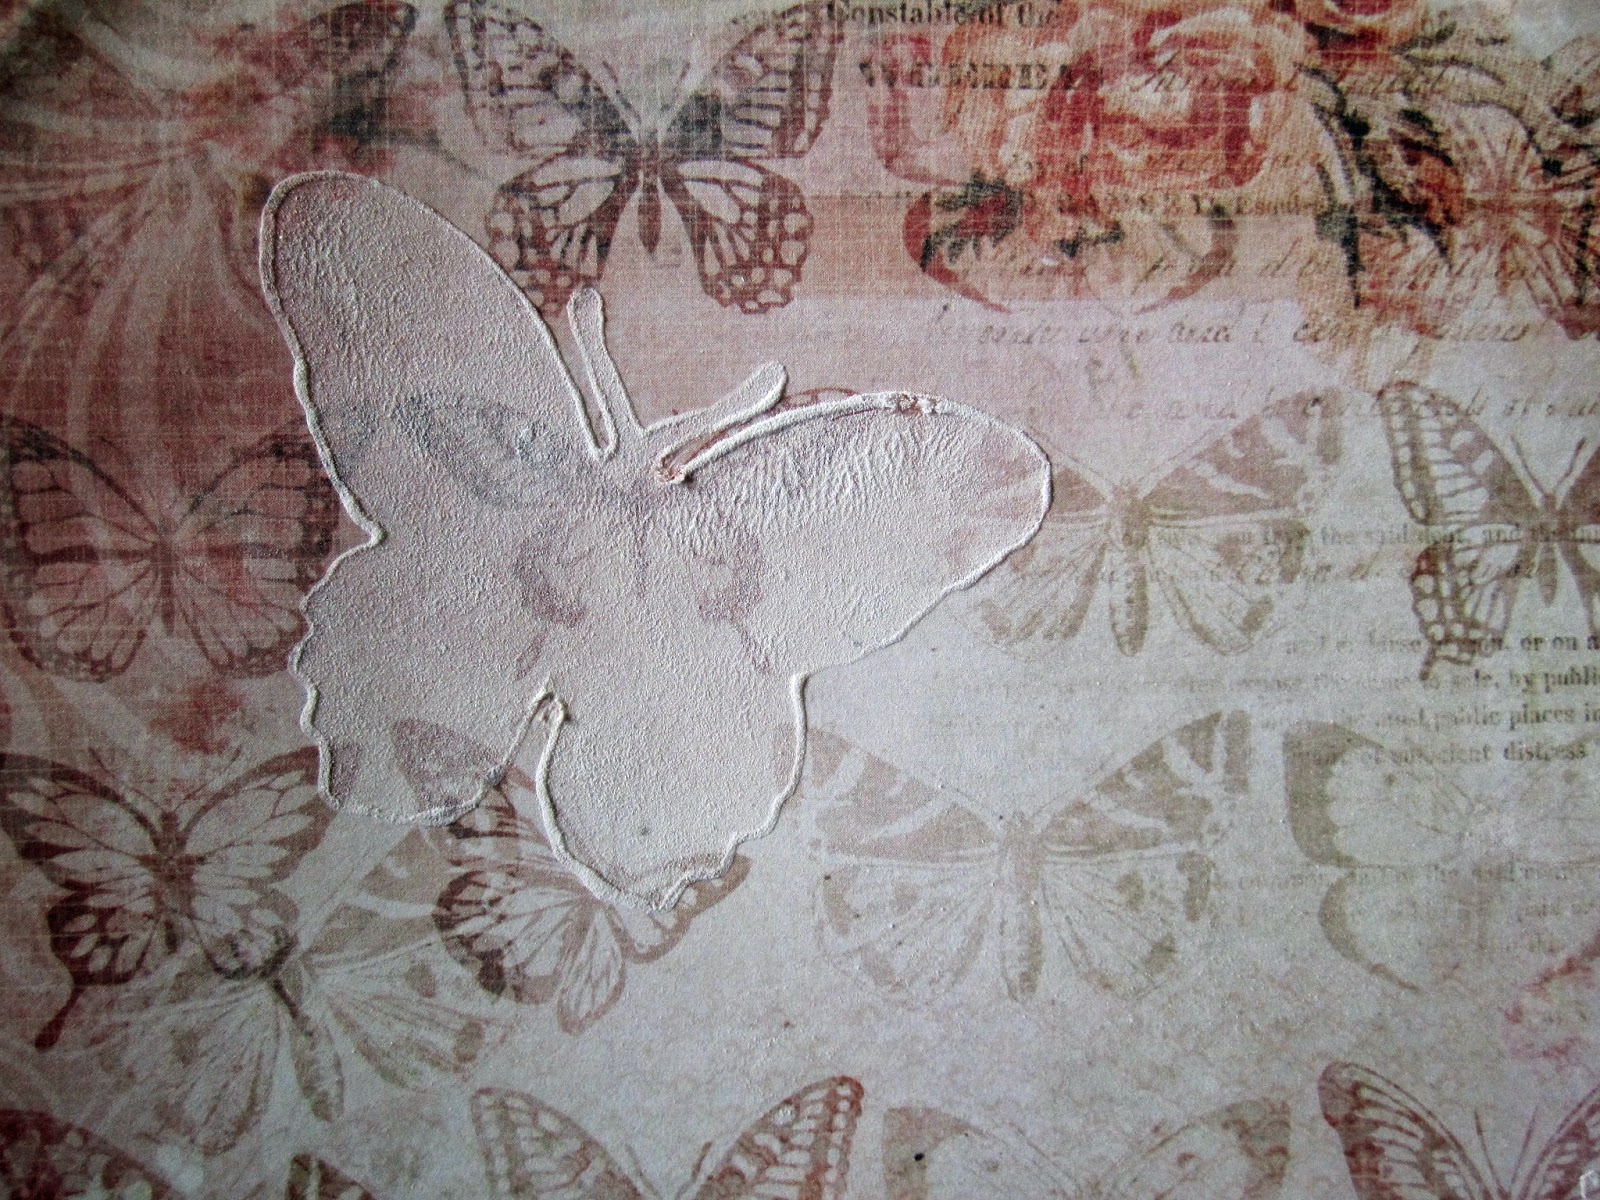
This could be possibly my fault as the original idea was to stamp with a foam stamp using wood glue and then sprinkle with talcum powder for a soft, suede-like result.  Not wanting to potentially ruin any of my stamps I die-cut a butterfly from fun foam and used that as a stamp, and because I used Mod Podge rather than wood glue as I figured both were more or less variants of PVA.

On the first attempt, I brushed the glue on, but the result was very ridgy and the glue oozed over the sides of the stamp.  On the second try, I applied the glue lightly with my finger, as you can see the glue still migrated to the side when pressure was put on the stamp.  Not only that but most of the powder rubbed straight off when the glue was dry.

Despite the fact its very messy, I might have another try as I did like the general result.  Perhaps this time I might mix the talc with the glue and apply it through a stencil - I think it would stay put then.  If not, a sealer might help.

In short, I can't recommend you repeat this technique but at least I might have saved you some time if you wanted to try it.

Saturday 10 May 2014

STAMP SCRAP STAMP

BACKGROUND STAMP
I'm a huge fan of Darkroom Door stamps - the only downside is that they have to be cut apart.  I haven't actually managed to wreck any yet but the possibility is always in the back of my mind.

Every downside, though, has an upside and all the little leftover bits of rubber will cling to an acrylic block to make a great background stamp.  I dismantled this one before it occurred to me that if I'd stamped it in brown on golden yellow it would be a great "giraffe" fur background....oh well, I can always do it again.

I guess if you were very keen you could cut the little bits of rubber into brick shapes or "stones" but I kind of like the random nature of just using them "as is" (or perhaps I'm just a very lazy person?)

Saturday 3 May 2014

RAINBOW VELLUM AND SILHOUETTE STAMPS

BLACK INK AND RAINBOW VELLUM
I know its a bit of a cheat calling this a "technique", but it is worth knowing how effective silhouette stamps (this is a lovely example from Darkroom Door) look on rainbow vellum!!

Just be sure to leave plenty of time for the ink to dry as it will take longer than normal paper.  I used Memento, a dye-based ink for this example.  Staz-On would work well as it would dry more or less straight away, but I'd probably steer away from the thicker pigment inks.

Another word of warning......(or do as I say not as I do).....If you look at the base of the left hand side of the windmill you will see a small boomerang mark.  This is not a part of the design but where I left a mark with my fingernail that could not be stamped over. Vellum is very sensitive to pressure so handle with card!