Showing posts with label Folding. Show all posts

Sunday, 4 December 2016

ADD STAMENS TO YOUR PAPER FLOWERS

FOLDED PAPER LILIES
I've featured these easy to make lilies before.  (There are lots of easy to find instructions available on-line), but just thought I'd pop in a picture of the difference some pearl stamens make.  They really do finish the flowers nicely and can be easily threaded through the already existing hole in the middle of the petals.
FOLDED PAPER LILIES WITH PEARL STAMENS

Saturday, 25 October 2014

ACCORDION FEATURE FOR CARD

TIE WITH A RIBBON

I really like little accordion books, and there's no reason you can't adapt them for cards as well.  This little book ties closed and features Darkroom Door stamps, but the format is handy if you're making a card that lots of people want to sign - just make the book a bit bigger if they want to add their "best wishes" as well.
Just an aside....the feather is a Couture Creations die that I've chopped up a bit to make a bit more "feathery" and I've tied two together with wire - white card on the bottom and  velum on top. I've added just a teeny spray of water to the vellum to make it curl slightly - again, it just gives a little more body to the die cut.
ACCORDION FEATURE FOR CARD

Saturday, 16 August 2014

SLIGHTLY MORE THAN SIMPLE FANS


THE FINISHED FAN
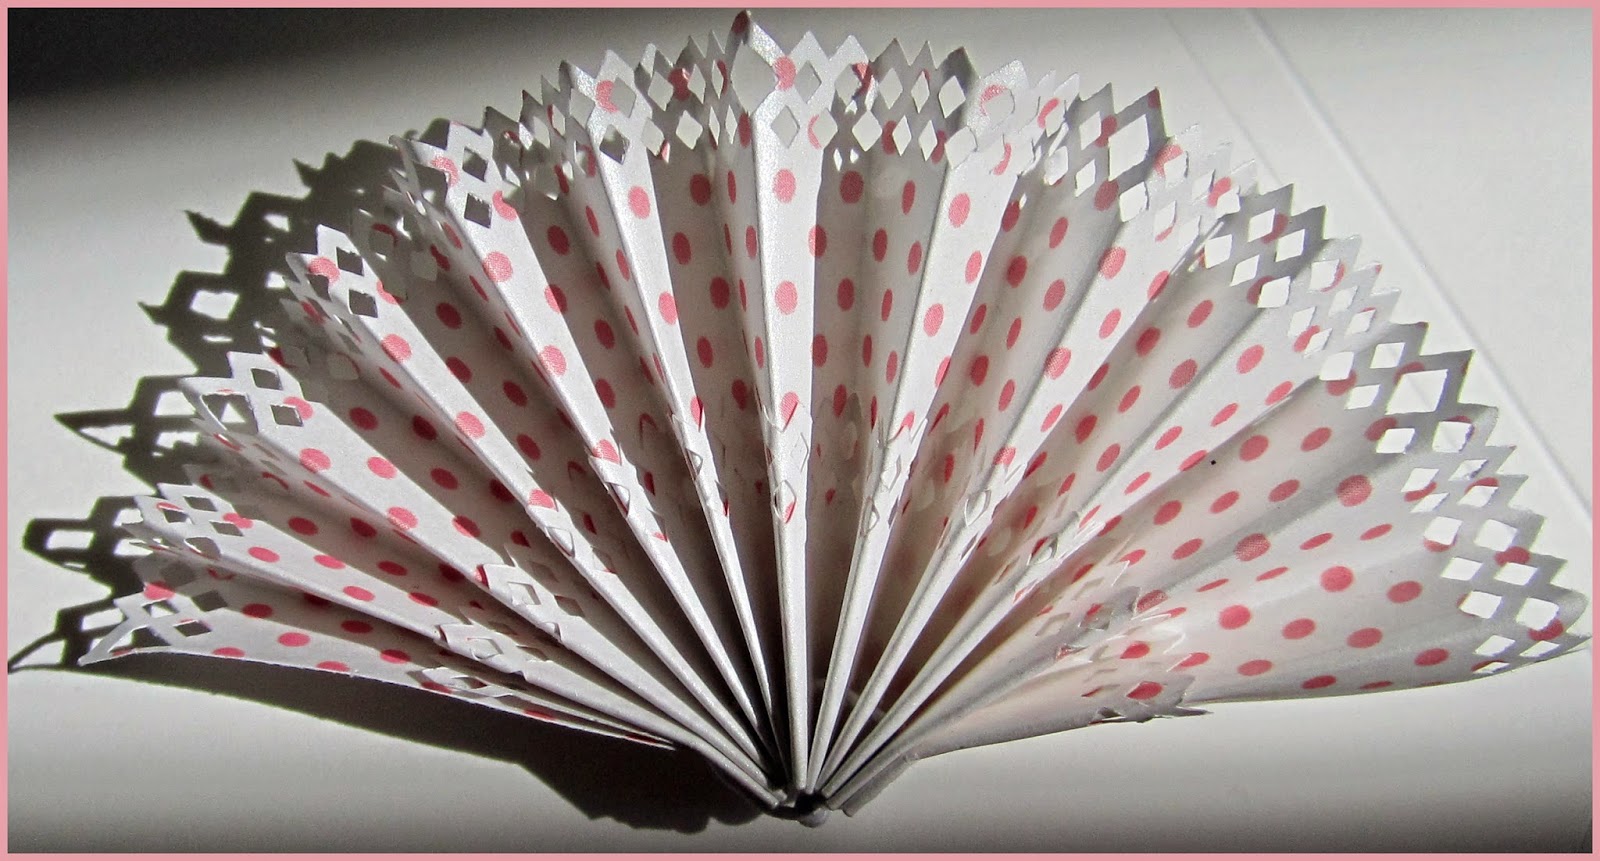
 A couple of techniques to share with this folded fan.  We all made them when we were kids, didn't we - even without the benefits of scoring boards, and bone scorers.  I think we used to secure the bottom either by folding it over a couple of times or stapling it together!!

Here are three folded fan ideas.
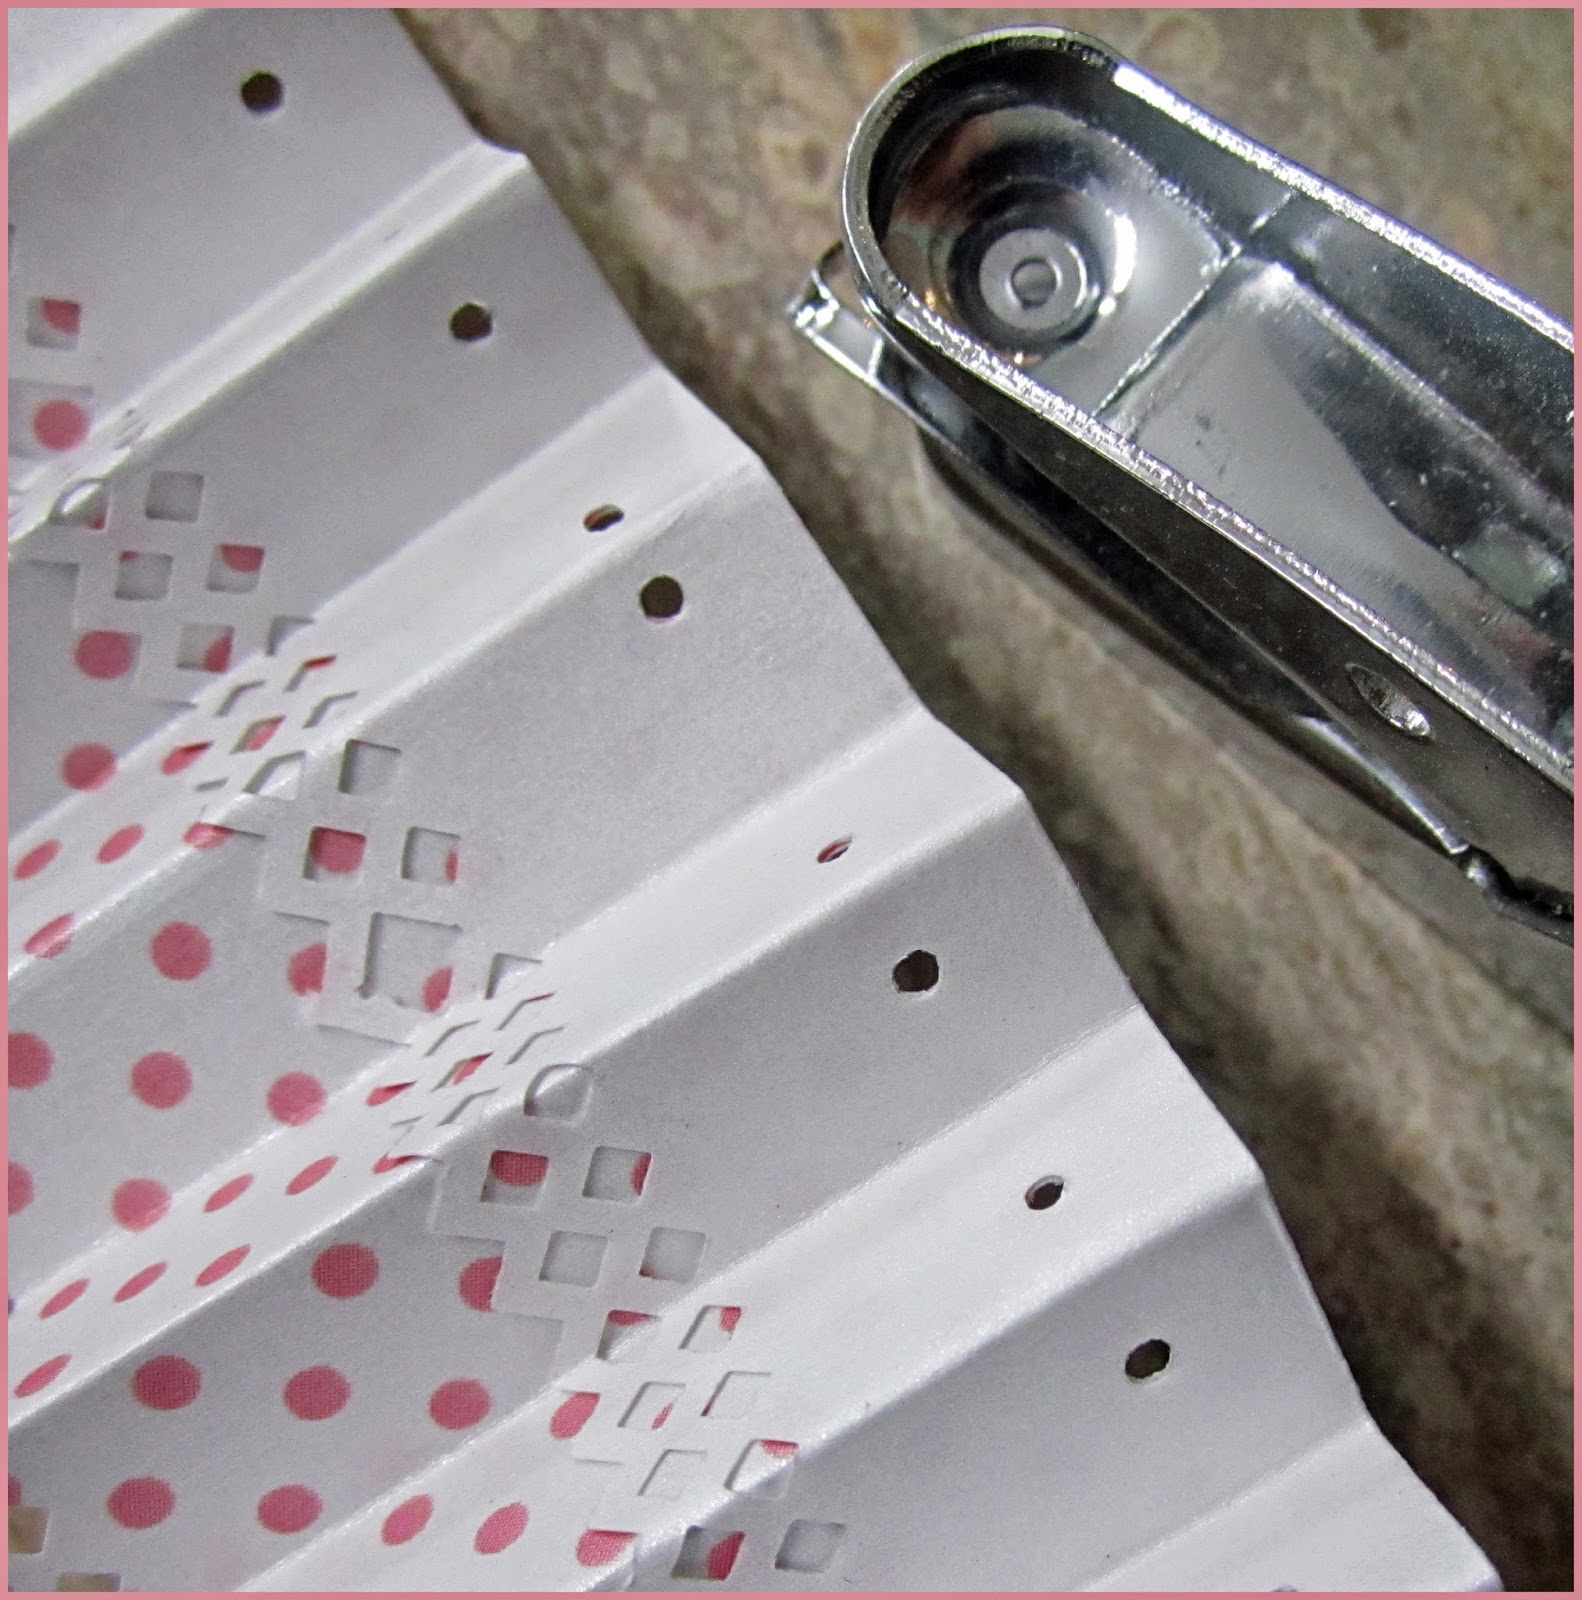
FOLDED AND PUNCHED LOWER EDGE
1.  Use a border punch to add a decorative edge to both sides of the strip.
2.  Bend the bottom up so that the reverse colour (in this case white) makes a contrasting section at the base of the fan.  (After posting this I realize I probably should have used a less subtle contrast in my example - but give it a try if you want to see for  yourself how much it adds to the "basic" fan.)
3.  Staples are a bit ugly (unless you're going for a grunge or industrial look) and are a bit hard to get through lots of layers, and glue can be messy and hard to apply in all those pleats, so an alternative way of securing the bottom is to punch along the (in this case, folded) bottom edge with a small circle handpunch, then thread thin white-coated wire in and out of the holes.  Fold up the paper, pull the wire tight and twist the edges together to secure.

Happy fan making!!!!


Saturday, 12 July 2014

FOLDED FLOWERS

FOLDED FLOWERS
I had a little space under the TV that kind of needed to be filled with something.  As I have many "somethings" that I'm not greatly fond of, I folded up these flowers as a "stand in" until I found A "something" I really loved. I'm actually kind of liking them so maybe they'll stay a while.  There are really clear instructions at:
http://foldingtrees.com/2008/11/kusudama-tutorial-part-1/

Saturday, 19 April 2014

IRIS FOLDING SCENERY (FROM MICHELLE POWELL'S BOOK)

FOLDED PAPER SCENERY
I really do wish that I could claim that this was an original idea, but it isn't.....its been taken almost directly from Michelle Powell's book on Iris Folding (called, funnily enough, "Iris Folding"!).  If, like me, you love the idea of choosing lots of colours and playing with layers and folds, you'll love this book.  It does contain some traditional patterns but also some really great ideas that can be used in more creative ways......And yes, having had such fun doing this little example, I do plan to try something more original!!!!

Saturday, 30 November 2013

FOLDING EMBOSSED PAPER

ORIGAMI CARD AND BOOKMARKS
I love paper folding so this is not the point of this weeks post - its was, rather finding out whether this highly embossed and somewhat stretchy paper could be folded.  The answer is "yes" although I wouldn't try models that involved a lot of sharp creases as the embossing tends to tear, nor any models that need too many folds as the embossing adds thickness.  HOWEVER.......simple folds like this are fine.  Just make a waterbomb base (a square folded in half with the sides squashed in (http://www.origami-instructions.com has clear diagrams if you need them).  The next step is to lift one side on the front and squash it flat, turn over and repeat on the other side.  That's it!  Place four side by side to make the motif on the card.  Make and package a few more to give as a gift - they slip nicely over page corners to make bookmarks.

Saturday, 12 October 2013

CATHEDRAL WINDOW CARD

Pink squares set into blue circles, with the edges folded over, make a faux "Cathedral Window" quilt.  I've added a bit of lace and ribbon to make a new baby card, but I think if I was actually making it "for real", I'd skip the fiddly bits and just cover an entire square card with the folded circle/square units as they are quite decorative enough on their own.

Saturday, 24 August 2013

ORIGAMI SHIRT CARDS

ORIGAMI SHIRT CARDS
Not all origami is highly three dimensional or huge.  There are lots of models that can be either used "as is" or easily adapted for use on cards.

This shirt is one of my favourites as it can be modified in lots of different ways to suit the particular occasion - add buttons or brooches, ties or scarves, colour in various ways etc.  Add a pocket and fill it with various items (hankies, tools, pens etc.etc.  There are a so many things you can do.  I've just made a couple of quick examples.

This shirt pattern is from Start Origami by Mark Bolitho but lots of other variations are available on-line

Saturday, 17 August 2013

DISPLAYING ORIGAMI

ADD TO AN EXISTING DISPLAY
 You have probably gathered that I really like paper.  I find folding it to be a very relaxing thing to do, and I love the tactile aspect of many papers.  The problem (such as it is) is what to do with the end results as (much like this blog) its the doing rather than the end product that is the main attraction for me.

I rescued the dictionary from which these examples are made from the bin at work, and rather liked them, so I'm putting my mind to thinking about how to display little bits of origami around the house in such a way that it doesn't look like a tip.
DECORATE YOUR POTPLANTS
Here are a couple of ideas .


The motif is made from interlocked waterbomb bases with a split pin in the middle.

The butterfly is the Yoshizawa butterfly.  You'll find lots of instructions on-line if you want to make your own.

Saturday, 8 December 2012

RUB-ONS ON SHELL

I have more than my share of moments when I buy something that I'm quite sure will come in useful one day, but don't quite know when that day will come.  As a consequence I have far too much "stuff".  Every now and then, I feel compelled to do a bit of sorting with "use it or lose it" in mind.  It never lasts very long but usually I end up giving one or two things away and actually using a couple of other things, before my attention span is exhausted and the rest of the craft room is safe for the next few months.
The orange shell disc in the middle of this card was one of a bag of six I bought thinking that perhaps I could make something in the jewelry line (its intended purpose) but in over two years nothing has sprung to mind.  I also have lots of little ends of ribbon that never seem to be quite long enough to use.  Add into the mix my rather sad rub-on collection, which I foolishly stored in a warm place with a couple of large books on top hence a sticky mainly unusable stack which I still haven't thrown out.
As you can see, I combined all of these elements, and sat them on top of a teabag motif made with pages from the book I mentioned last week,  I then mounted it onto some decorative paper, then onto a card and well....the result is slightly unusual but OK.  Plus of course, I can feel slightly smug about finally using some of my more obscure craft room "treasures".  The teabag fold is a variation of my favourite kite shape in which one side is opened and secured under the folded side of the next shape.  As this blog is supposed to show a different technique each week, I'll go with  " Rub-ons on shell" as the title!

Saturday, 17 November 2012

GIFT CARD SET


I wanted to make a little gift card set for a demo I did some time ago, but didn't want to spend a week of evenings making it, so I came up with this set.  I started with the envelopes as its always easier to make a card to fit an envelope than try to find an envelope to suit an unusually-sized card.  As luck would have it I also found a pre-made box which was just the right size.  The base cards were made of  Bazzill as was the background. the squares were punched from two sorts of Kaiser patterns using my 35mm square hole punch, and the motif was finished with a little red Kaiser pearl.  The whole lot were put together in a sort of "assembly line" once all the squares were folded.  The whole production only took a couple of hours, including the decoration of the box, and I'm quite pleased with the result.

Saturday, 3 November 2012

ORIGAMI BOXES


I've fiddled around with origami since I was about 8 (which was a very long time ago) and was delighted to come across a site (www.origami-instructions.com) that had quite a few models I hadn't encountered before. These boxes are both pretty, and practical for holding those little bits and pieces like paperclips and split pins etc.  There were instructions for lots of different folded flowers too (which I'll be trying as soon as I have some spare time) and lots of other fun things.

Saturday, 7 July 2012

CUT UP YOUR STAMPS

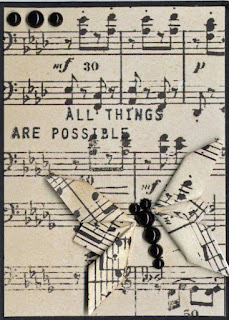
I needed some words to go on this little panel  but couldn't find quite the right thing.  I saw a Kaiser (and no I don't work for them.....its just that they make some good stuff at a reasonable price so its a bit over-represented in my craft room) stamp that was almost right.  It had a religious text that was inappropriate for how I wanted to use this card, and in any case, it wouldn't have fitted in the small space with extra words.  A few snips with the scissors later and I had just what I needed.  Acrylic stamps (I have just found out) cut really easily, and if you need them as they were they can be somewhat reassembled on a clear block.  I'm now revisiting some of the unused text stamps from other sets I own to see how they can be made useful.  After all....."All things are possible".

Saturday, 23 June 2012

KITE-FOLD CARDS

 The kite-fold is one of the easiest tea-bag/kaleidoscope folds.  Just turn a square on end and bend the sides in to meet in the middle.  Eight of them make a circle.  I was just using up some of my Kaiser paper left-overs when it struck me how much the choice of colour and pattern affected the end result of what is esentially three examples of the "same" card. 

I like the look of the split pin in the middle but if your middle is a bit messy, it doubles as a great disguise.

Saturday, 25 February 2012

FLATTENED WINDMILL CARD


This panel is made is made from four small windmills, flattened, and stuck down flat. To make the “windmills”, fold and unfold squares in half along the diagonal (so the folds make a big X), cut from each corner half way down the fold line towards the centre and finally fold every second tip to the centre and secure (I used a little double sided tape and then a split pin, which also serves as a feature for the centres). After attaching the squares to the backing paper, add a fifth split pin to the middle for decoration. Double-sided paper usually works best, especially when its mounted on a contrasting colour.