Playing with paper - a technique a week for those who enjoy the journey as well as the destination!
Showing posts with label Gesso. Show all posts
Showing posts with label Gesso. Show all posts
Wednesday, 7 September 2016
STAMPING OVER TEXT
I wanted to stamp and colour over a manuscript but when I just used pencils the printing was so intense as to be distracting and the outline of the stamp was lost.
After a bit of playing around this solution seems to be OK (not brilliant but OK). I stamped onto the background, then painted over it with gesso, which provided a nice "toothy" base for colouring. The notes can still be seen underneath but much more subtly.
I then outlined the stamped image using a fine black marker pen. As I was using an acrylic stamp (a freebie from a magazine) I could have tried re-stamping the image over the top but I quite like the hand-drawn look and wasn't totally confident about how well I could align the two pictures.
Saturday, 15 September 2012
WHITE GESSO ON BLACK CARD
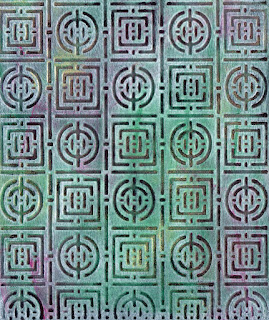
 I'd never really used gesso until the last few months but now I'm a real convert, as there seems to be so many ways in which it can be used. If you want a similar effect to the one in the photo, cover black card with a thin layer of white gesso. When it's dry sponge on two or three different inks (I've used red, green and gold, and to be honest, just applied it straight from the pads) I've then just run it through my Cuttlebug, using a folder from Craft Concepts.
Labels:
Background techniques,
Embossing,
Gesso,
Paint
Location:
Riverside TAS 7250, Australia
Saturday, 30 June 2012
MARKER PENS AND GESSO
I quite like the look of coloured embossed backgrounds, but these ones (a Cuttlebug folder and a Couture Creations design), initially coloured with some cheap marker pens were a bit too bright for my liking. Also some of the areas where I'd overcoloured the pen stood out from the rest. A thinnish layer of white gesso saved them from the bin. It toned the colours down nicely and disguised the "dodgy" bits. Unfortunately as I didn't think this would work very well I didn't do a "before and after" scan for comparison, so you'll have to take my word for it! All in all a technique I'll use again - maybe even deliberately next time!!
Labels:
Background techniques,
Colouring,
Embossing,
Gesso
Location:
Riverside TAS 7250, Australia
Saturday, 25 February 2012
GESSO, GEL PENS AND EMBOSSING
This is a hybrid card but
you could make something very similar without your computer. To make
the background, I embossed lightweight black card with the Cuttlebug
Owl Flourish folder. I roughly coloured in parts of the owl and
swirly bits with gold and silver pens and then covered the lot with a
thin coating of gesso. After it was completely dry I gave it a light
sanding. I was a bit disappointed that the gold and silver didn't
show up quite as well as I'd hoped, but was still pleased with the
overall result. (See small picture) From this point on, I scanned
the result and added the border (stroke in dark grey sampled from the
image), greeting (in the same colour), moon (highly feathered
circular selection filled with light gold on a separate layer so a
little could be removed with the eraser from the owl) and eye
highlights (oval selections filled with white) with digital effects. You could easily achieve similar results by mounting the owl on a
dark grey card, stamping and embossing a greeting, sponging on gold ink for the moon,
and finally adding eye highlights with a white gel pen.
Subscribe to:
Posts (Atom)


