Saturday, 20 September 2014

ALL SORTS EMBOSSING

ALL-SORTS EMBOSSING
Following on from last week's theme of using what you already have, is this week's example of some of the things you can use to emboss in your Cuttlebug/Bigshot etc.
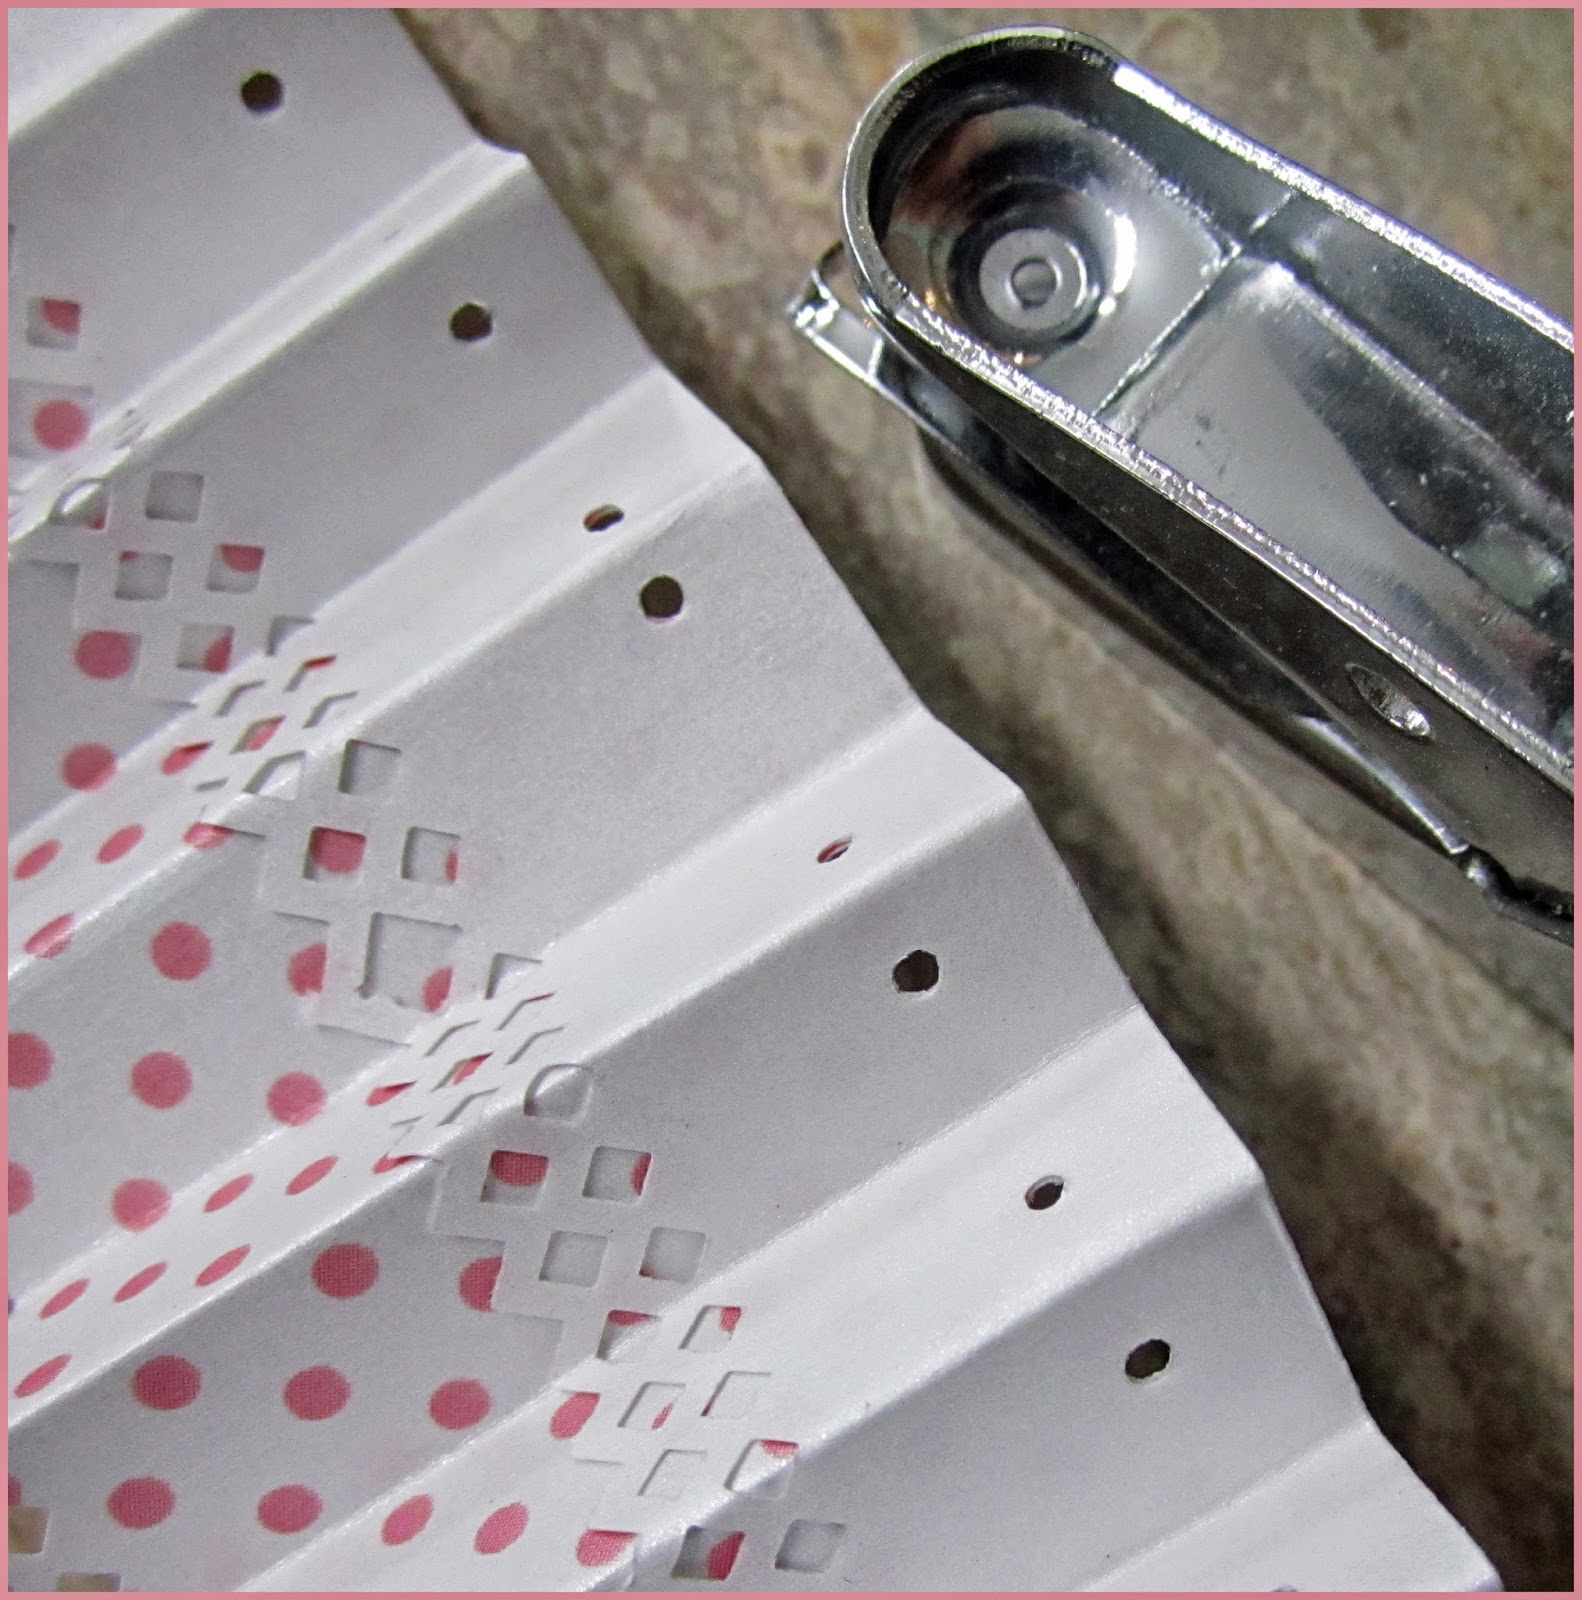
The possibilities are endless but from the few things I tried, I'd suggest that best results are obtained with low, stiff items such as the mesh, second best with low stretchy things like the rubber bands, and less successfully higher things like the paper clips and coins.  The latter tend to tear the paper.  I used 200g card, but imagine that if you used a softer handmade paper and perhaps made it just a little damp (not wet) you'd probably have less tearing.
To emboss "all sorts" in the Cuttlebug you need a rubber embossing mat, which goes on top of the paper.  The items go underneath.  You'll also need at least one plate (probably your white A plate), if not two (B or C plate) on the very bottom of the stack, and ideally another plate (B) on the top.  Its a matter of juggling the plates (possibly with the addition of cardboard shims) to make the right combo that is thick enough to have the desired embossing effect without endangering your machine in any way.  Cuttlebugs are tough little machines but they will break if you force things through so proceed with caution!!
I've also used white card for these examples actually didn't think this would work anywhere near as well as it did.  As I'm a bit overly busy at the moment I don't have time to repeat using a core colour paper and sanding or even inking over the design, but I think both would enhance the effect. Mind you, this does give me something else to post when I do have more time to play!!

Saturday, 13 September 2014

PAPER LEAVES

DIY LEAVES
Now that we have access to all those lovely dies and hole punches its often easy to overlook things that are right in front of us.  This is an example of one thing I did manage to notice.......

The leaf at the top blew in through the door at work.  The leaf at the bottom is some of our packing card with under 5 minutes "work".

I used the real leaf as a template, and cut out the other with scissors (yes...they're still useful).  After scrunching it up a bit, I added some "veins" with a coloured pencil (there was only one brown one in the cupboard so I didn't really chose the shade), then dabbed a bit of distress ink here and there.  A little bit more scrunching added extra shape.

A bit more time, and more careful selection of colours would do wonders!!!  In the meantime I'm waiting for summer so I can acquire a new range of "leaf templates"!!


Saturday, 6 September 2014

PARTIAL DIE CUTTING

PARTIAL DIE-CUT
 You might have noticed that I'm having a bit of a Cuttlebug thing happening at the moment.  It is work-related, but even so, I've been discovering and rediscovering lots of techniques that I either haven't tried or had all but forgotten.  The trouble is, Cuttlebugs are just so useful without even trying to do tricky things, its easy just to stick to straightforward die-cutting and embossing.

TAGS FEATURING PARTIAL DIE-CUTTING
This week's technique is simple but I hadn't really played around much with it until recently, and I've added "play more soon" to my "To Do" list.  Dies obviously only cut where the cutting ridge is in contact with the paper/card, so by threading the paper (or in this case a thick tag) through the die, a decorative edge is added using a bracket square die.  I've also done some partial cutting with the little Marianne bird die into the bottom of other tags, and then used the cut-puts as extra decoration.

I'm now starting to look at my dies in a whole new way, when I consider all the different sections that could be used in different ways.

Saturday, 30 August 2014

TORN PACKAGING FOR BACKGROUNDS AND TEXTURE

TORN PACKAGING FOR BACKGROUNDS
People are ripping packing card apart all over the internet at the moment.  More talented folk than me are even ripping patterns and complicated designs.  I thought at the very least I should give it a go.  As I don't do a lot of grunge style work I wasn't anticipating it being very useful for my cardmaking but the effect is kind of compelling and may yet find its way to a sample card or two in the future.

It did, however, occur to me that a scan or photo of the torn card would make a terrific texture to add to some of my photos.  The two I've played with aren't "quite there" but, as you can see, its worked well enough to justify a bit of playing around.  Just drag the torn card photo on top of another picture and play with blending modes in Elements, if you'd like to try for yourself.

SUPER-SATURATED AUTUMN LEAVES
+ TEXTURE

SEPIA + TEXTURE

Saturday, 23 August 2014

CUT A RECTANGLE WITH A SQUARE DIE

RECTANGLE FROM A SQUARE DIE
This is one of those simple techniques that seems almost self-evident after someone has shown you how to do it!!

Position your die and paper in your Cuttlebug, roll through almost, but not quite to the end, then roll backwards.  Reposition the die so that the scallops align, at the end.  (You might want to use some removable tape to make sure it stays in place).  Roll through to complete your cut.

That's all there is to it!!  I'm not sure how it would work in other die-cutting machines but expect the same principle would probably apply.

Saturday, 16 August 2014

SLIGHTLY MORE THAN SIMPLE FANS


THE FINISHED FAN
 A couple of techniques to share with this folded fan.  We all made them when we were kids, didn't we - even without the benefits of scoring boards, and bone scorers.  I think we used to secure the bottom either by folding it over a couple of times or stapling it together!!

Here are three folded fan ideas.
FOLDED AND PUNCHED LOWER EDGE
1.  Use a border punch to add a decorative edge to both sides of the strip.
2.  Bend the bottom up so that the reverse colour (in this case white) makes a contrasting section at the base of the fan.  (After posting this I realize I probably should have used a less subtle contrast in my example - but give it a try if you want to see for  yourself how much it adds to the "basic" fan.)
3.  Staples are a bit ugly (unless you're going for a grunge or industrial look) and are a bit hard to get through lots of layers, and glue can be messy and hard to apply in all those pleats, so an alternative way of securing the bottom is to punch along the (in this case, folded) bottom edge with a small circle handpunch, then thread thin white-coated wire in and out of the holes.  Fold up the paper, pull the wire tight and twist the edges together to secure.

Happy fan making!!!!


Saturday, 9 August 2014

ENGRAVING WITH A DIE

ENGRAVING WITH A DIE
Another simple little Cuttlebug idea that came about as a happy accident.  I needed to shim a die, and for reasons I won't bore you with, put a sheet of thick packing card under the top cutting plate to do the job.  The die (which is from Couture Creations), cut through the paper I wanted cut, but then cut into the thick packing shim without cutting right through, leaving a debossed/engraved image which actually looks much better in real life than the photo would indicate.
I think experimenting with using extra-thick card (or a couple of pieces of card) with the intention of NOT cutting the shape out  of one is worthwhile.  (Do adjust the stack accordingly, though, and never force anything through, as tough as they are Cuttlebugs and Bigshots are breakable if you overdo it.
A bit of inking over the top would add interest.  I think with a little effort I could probably get a nice engraved leather look.........but that will have to wait.  So much I want to do, so little time!!!!!!!!!!

Saturday, 2 August 2014

STAMPED BABY WIPES

Stuck to card with Jac paper
Cut shell with babywipe background
Alcohol-free baby wipes make stamp-cleaning easy, especially if you're crafting away from home.

These really thick, soft ones from a well-known chain store (oh, OK, from Target) also make brilliant backgrounds.  No need to be too fussy - just avoid cleaning colours opposite each other on the colour wheel on the same cloth unless you want a bit of a murky mess (even that might have applications).

The next step of this "non-technique" came about when I left a recently (over) inked shell stamp face down on a cloth and found that it had left a very clear impression, even given a bit of bleeding of the ink.  Stuck to cardboard with double sided Jac paper, and then cut out with scissors, leaving just a little border all around, the shell makes a really interesting embellishment, with a great soft furry texture.

Saturday, 26 July 2014

ZENTANGLISH

ROSE CUT OUT WITH "DOODLES"
I had a few of these cards (which are still available from Regal Craft Cards) in the storeroom and was looking for something to do with them, apart from just colouring in, or putting some coloured fabric or paper behind the cut-out rose.

What I ended up doing - doodling - is hardly earth-shattering, but even so, I liked the end result enough to share it with you.  Its just black fine marker on white card under the main flower, and a white gel pen on black card under the leaves.

I tried to finish it off with a hand drawn border which turned out a little bit less than amazing but I still like the idea.

I think I'll have another go at this.  Any card with a cut-out could be used.


Saturday, 19 July 2014

3D WITH STAMPS

SIDE VIEW
 There are a couple of techniques to share this week.  The first is a background.  Versamark Dazzle is an ink pad that has a similar effect to normal Versamark (i.e. it shows stamped on dyed-through papers a shade or two darker than the paper colour) but adds a little sparkle as well.  Its not over the top, just a subtle shimmer (which obviously doesn't photograph easily).
The background here has been made with a variety of Darkroom Door stamps.

3D SHELL CARD
The main shells are from Graphic45, which brings us onto technique 2, which is to add a little dimension by stamping two images, cutting the second smaller than the first and then fixing it over the top with foam tape or silicone glue.  It works best if you do a little shaping first.  There are tools and mats with which you can do this, but gently stroking the middle of the shape in the palm of your hand works for a little project such as this one.

Saturday, 12 July 2014

FOLDED FLOWERS

FOLDED FLOWERS
I had a little space under the TV that kind of needed to be filled with something.  As I have many "somethings" that I'm not greatly fond of, I folded up these flowers as a "stand in" until I found A "something" I really loved. I'm actually kind of liking them so maybe they'll stay a while.  There are really clear instructions at:
http://foldingtrees.com/2008/11/kusudama-tutorial-part-1/

Saturday, 5 July 2014

LEAF-PRINTED BACKGROUND

LEAF PRINT BACKGROUND
 I bought a really nice set of leaf stamps recently, but there is an alternative - real leaves!!  This little bunch came from a banksia rose.  I just dabbed some Versacolour ink directly onto the underside of the leaves. Pigment inks are a bit stickier than dye-based ones and I suspect work best for this, though I'm happy to be corrected.  I'd already made a base background by "printing" with distress inks on an acrylic block (as in a recent post).  the brighter green is the first print, the more subtle example is the second print.  I placed the inked leaves on top and brayered over the top to apply an even pressure, and made a couple of prints before re-inking.  I applied them in a random way, similarly to the stamps in last week's example.
The results with rubber stamps are obviously more predictable but this approach will produce a truly unique result (which you can of course scan if you want to reproduce it).

Saturday, 28 June 2014

OVERSTAMPED BACKGROUND ON TEXTURED CARD

 Perhaps I should have called this the "Background" blog but for whatever reason its backgrounds that are interesting me most at the moment.  I guess I'm trying to wean myself from reaching for the patterned paper all the time, and I'm pleased to find there are many quick alternatives.  This one in particular, takes less time that cutting paper to size and putting on some doublesided tape.

OVERSTAMPED BACKGROUND
In this example I've stamped multiple times onto a textured ivory card, inking about every third time, and stamping over the edges.  I tried with a few different stamps but it seems to work best with a fairly solid one (the flower and shell are both from Darkroom Door).  I used Versafine ink, which is good for detail because even although the result of the overstamping and the texture is abstract, I wanted the shape to remain evident.

To complete the card, I would stamp a single image onto co ordinating smooth card, double mount it on ivory and green (or blue for the shells) and place it in the centre of the card.  Of course, that's just one option.

Saturday, 21 June 2014

SALT AND ACRYLIC WASH BACKGROUND

SALT AND ACRYLIC WASH
I love this paper!!   Just brush a very watery layer of acrylic paint over a sheet of thick paper (I use a dark green paint from Kaiser), then sprinkle with salt (I used ground sea salt).  After its thoroughly dry brush off the salt and you're left with tiny little specks where the grains of salt lay.  In this example they look a bit like miniature moon craters.  I think you could do some great faux rust with oranges and red.
I've seen this technique used with different colouring mediums (watercolours, ink) and different salts, and suspect all the combinations may produce somewhat different results - certainly worth exploring!!

Saturday, 14 June 2014

DISTRESS INK AND ACRYLIC BLOCK BACKGROUNDS

DISTRESS INK & ACRYLIC BLOCK BACKGROUND
As you can probably tell by now, I've just bought myself some new Distress Ink sets. I've been reading about inking backgrounds using a craft mat and wondered, given I usually worked on a small scale, whether or not an acrylic block would work.  It does!
Just blob a colour or two of distress ink straight from the pad onto a large acrylic block, spritz it with water until the colours start to run together and blend then either turn it over and "stamp" onto your paper/card, or alternatively, put the paper onto the block.  If you do the latter you can smooth it over with your hand which helps the colours to blend.
CLOSE UP